Table of Contents
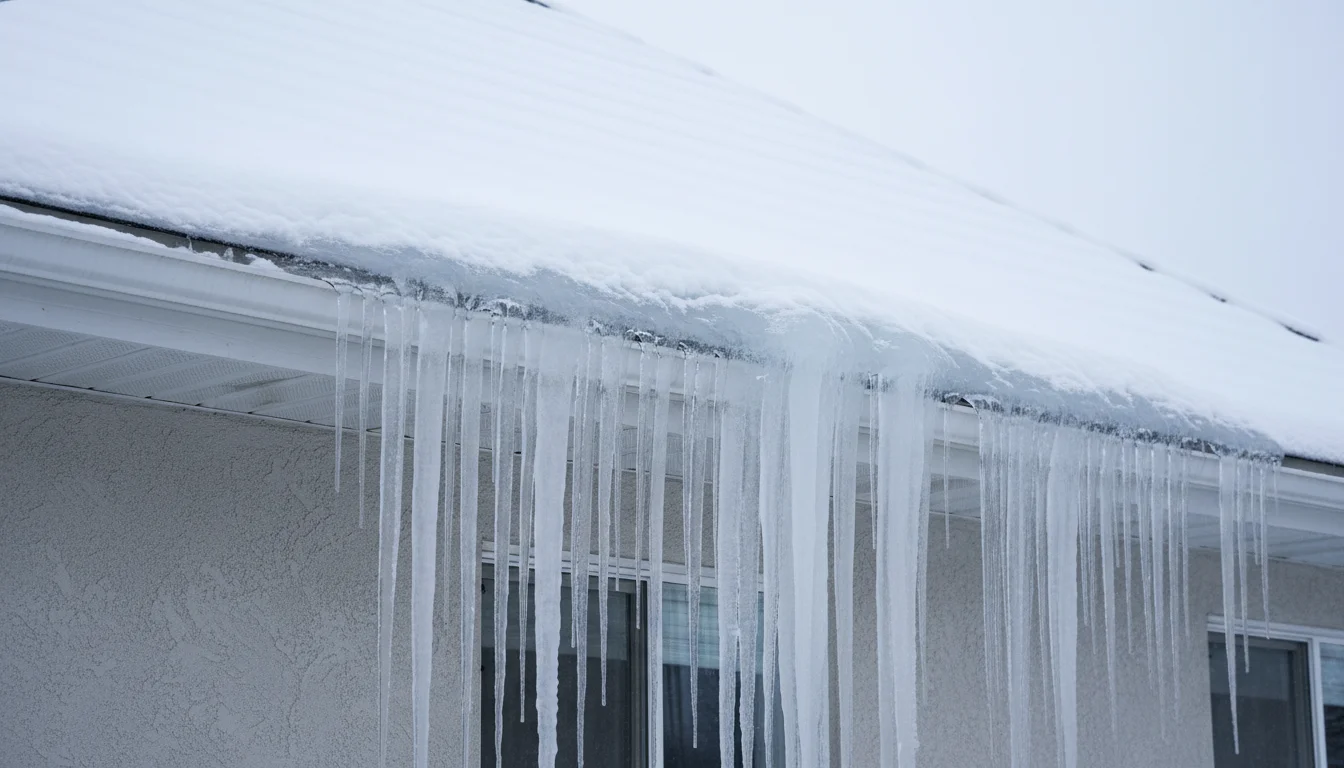
Ice dams are the winter headache you don’t notice until it’s too late. They form when heat escaping from your attic melts snow on the roof, which then refreezes at the colder eaves. The result: a ridge of ice that traps water behind it, forcing that water under your shingles and into your home. The damage can be extensive—wet insulation, stained ceilings, ruined drywall, and even mold growth.
The good news is that ice dams are preventable and removable. The bad news is that removing them incorrectly can damage your roof as badly as the ice itself. Here’s how to deal with ice dams safely, effectively, and permanently.
1. Melt Ice Dams with Hot Water
The safest removal method for existing ice dams is melting them with hot water. This requires a garden hose connected to a hot water source and at least two people for safety. One person holds the ladder (never place it on ice or snow), while the other directs a gentle stream of hot water along the ice dam.
Work from the bottom up, melting channels through the ice so trapped water can drain. Be patient—large dams take time. Never use a pressure washer; the high pressure can lift shingles and force water underneath them. The goal is melting, not blasting.
This method is best left to professionals who have the proper equipment and safety training. If you attempt it yourself, wear slip-resistant boots, use a sturdy ladder on stable ground, and have someone spotting you at all times. One slip on an icy roof can be catastrophic.
2. Install Heat Cables for Prevention
Heat cables (also called heat tape or roof de-icing cables) are electric wires that warm up to prevent ice formation. They’re installed in a zigzag pattern along roof edges, in gutters, and downspouts before winter arrives. When turned on, they create channels for melted snow to drain rather than refreezing.
You can install them temporarily for immediate problem areas or permanently if your roof is prone to ice dams. Permanent installation is best done by a professional during warm weather. The cables plug into outdoor outlets and should be equipped with thermostats so they only run when temperatures drop.
Heat cables are particularly effective on north-facing roof planes that get little winter sun and on lower roof sections where upper roofs drain onto them. They’re not a complete solution—you still need proper insulation—but they provide valuable protection during freeze-thaw cycles.
3. Remove Snow from the Roof
If warmer weather is coming and you need immediate relief, removing snow from the roof eliminates the source material for ice dams. A roof rake—basically a long-handled shovel on a pole—lets you pull snow down from the ground or a ladder without climbing onto the roof.
Work from the edge upward, removing the bottom few feet of snow where ice dams typically form. Leave a thin layer of snow to protect shingles from the rake itself. Never use metal tools that can scrape or damage roofing materials.
For heavy snow or steep roofs, hire professionals with proper safety equipment. They’ll use plastic shovels and specialized tools designed for roof work. The National Roofing Contractors Association recommends leaving some snow rather than scraping down to bare shingles, which risks damage.
4. Apply Calcium Chloride Socks
For a DIY approach that doesn’t require climbing, fill old pantyhose or long socks with calcium chloride ice melt (not rock salt, which can damage roofing and plants). Lay these perpendicular across the ice dam, hanging slightly over the gutter.
The calcium chloride slowly melts through the ice, creating channels for water to drain. It’s slower than hot water but much safer. Use two or three socks for larger dams. Replace them as they dissolve—typically every few hours for heavy ice.
Place a tarp or sheet on the ground below to catch runoff and protect landscaping. Calcium chloride works at lower temperatures than other de-icers and won’t damage asphalt shingles, though you should still avoid direct contact with metal gutters if possible.
5. Improve Attic Insulation
Ice dams form because heat escapes into the attic and warms the roof from below. The permanent solution is sealing those heat leaks. Start by adding insulation to reach R-38 to R-60 in cold climates (that’s typically 12-16 inches of fiberglass or cellulose).
Focus on the attic floor, not the roof itself. You want the attic cold—the same temperature as outside—so snow doesn’t melt unevenly. Seal air leaks around light fixtures, plumbing vents, chimneys, and attic access hatches with expanding foam or caulk before adding insulation.
This isn’t a quick fix, but it’s the only method that prevents ice dams permanently. A well-insulated attic pays for itself through lower heating bills, and your roof will last longer without the freeze-thaw stress that causes shingles to fail prematurely.
6. Ensure Proper Attic Ventilation
Even with good insulation, poor ventilation traps warm air in the attic. You need intake vents at the eaves (soffit vents) and exhaust vents at or near the ridge to create airflow that carries heat out before it can warm the roof deck.
Clear soffit vents of insulation using baffles ( foam or cardboard channels that keep insulation back while allowing air through). Install ridge vents along the roof peak if your roof doesn’t have them. The goal is continuous airflow from bottom to top.
Check bathroom fans, dryer vents, and kitchen exhausts—they should never vent into the attic. Warm, moist air from these sources melts snow and creates ideal conditions for ice dams. Reroute them through walls to the outside if needed.
7. Install Ice and Water Shield
Ice and water shield (also called ice barrier membrane) is a self-adhesive waterproof underlayment installed beneath shingles at roof edges, valleys, and penetrations. If water does get under shingles, this rubberized barrier prevents it from reaching the wood deck and interior.
Building codes in cold climates often require two to six feet of ice shield at eaves. If you’re replacing your roof, insist on full coverage in problem areas. It’s more expensive than standard felt paper but far cheaper than repairing water damage.
For existing roofs, you can’t add ice shield without removing shingles. However, knowing whether your roof has this protection helps you assess risk. Homes built before the 1990s often lack it entirely, making them more vulnerable to ice dam leaks.
8. Clean Gutters Before Winter
Clogged gutters trap snowmelt, giving it time to freeze and form ice dams at the roof edge. Clean your gutters thoroughly in late fall after leaves have dropped but before the first freeze. Remove all debris and flush downspouts with a hose.
Consider gutter guards to reduce debris accumulation, but know they’re not maintenance-free. Even guarded gutters need annual inspection and cleaning. Make sure downspouts extend several feet from the foundation so discharged water doesn’t pool and refreeze against the house.
Heated gutter cables can be added to existing gutters if ice buildup persists. These work with roof heat cables to keep drainage paths open. Combined with proper insulation and ventilation, clean gutters dramatically reduce ice dam formation.
Ice dams are a symptom of heat loss and poor drainage, not a roofing defect. Temporary removal methods like hot water and calcium chloride solve immediate problems, but permanent prevention requires fixing the underlying cause: warm attics and poor ventilation.
If ice dams are a recurring problem, invest in an energy audit to identify heat leaks. The cost of proper insulation and ventilation pays back through lower energy bills and avoided water damage. Your roof will thank you, and you’ll sleep better during winter storms knowing your home is protected.