Table of Contents
Spider mites are tiny bastards. You won’t see them until your plant looks like it’s been dusted with powdered sugar or wrapped in fine webbing. By then they’ve been feeding for weeks, sucking sap from leaves and turning your fiddle leaf fig into a sad stick. The good news: they’re soft-bodied and easy to kill once you spot them. The bad news: they reproduce fast, so you need to act before they colonize every plant in your house. Here’s a complete battle plan.
1. Inspect Plants with a Magnifying Glass
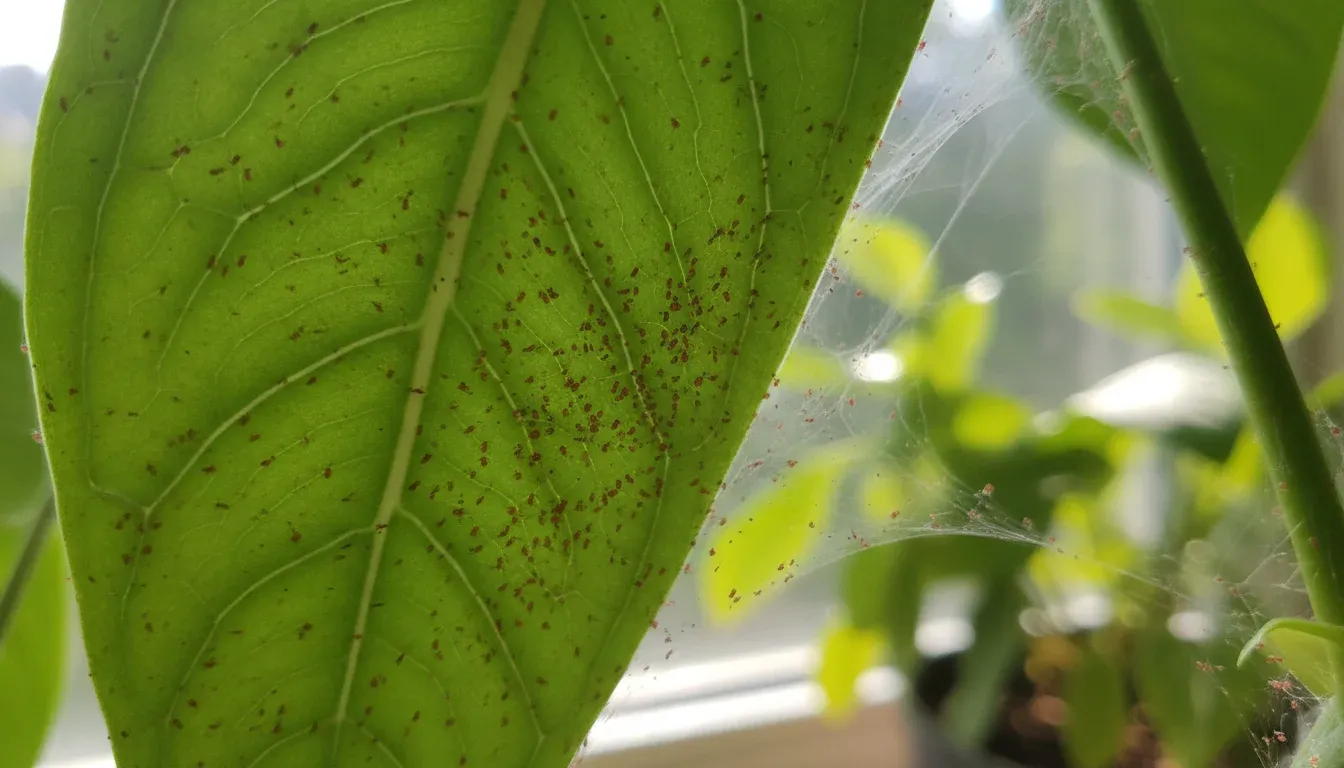
Spider mites are nearly invisible to the naked eye—about 0.5mm long. You’ll need a 10x to 15x magnifying glass or jeweler’s loupe to spot them clearly. Look on the undersides of leaves where they congregate. You’ll see tiny oval creatures with eight legs (adults) or six legs (hatchlings), usually pale, red, or spotted depending on the species.
Do this inspection weekly, especially during hot, dry weather when mites thrive. Check new plants thoroughly before bringing them home from the nursery—this is how most infestations start. Early detection means early intervention before the population explodes.
2. Watch for Yellow Stippled Leaves
Before you see webbing, you’ll see damage. Spider mites pierce leaf cells and suck out the contents, leaving tiny pale or yellow dots called stippling. On heavily infested plants, leaves take on a dull, bronzed, or silvery appearance. Flowering or fruiting plants often show damage first on their newer growth.
Flip suspect leaves over and look for the telltale fine silk webbing—spider mites produce this to protect themselves and their eggs. If you see webbing, you’re dealing with an established colony, not just a few stragglers. The earlier you catch the stippling stage, the easier treatment will be.
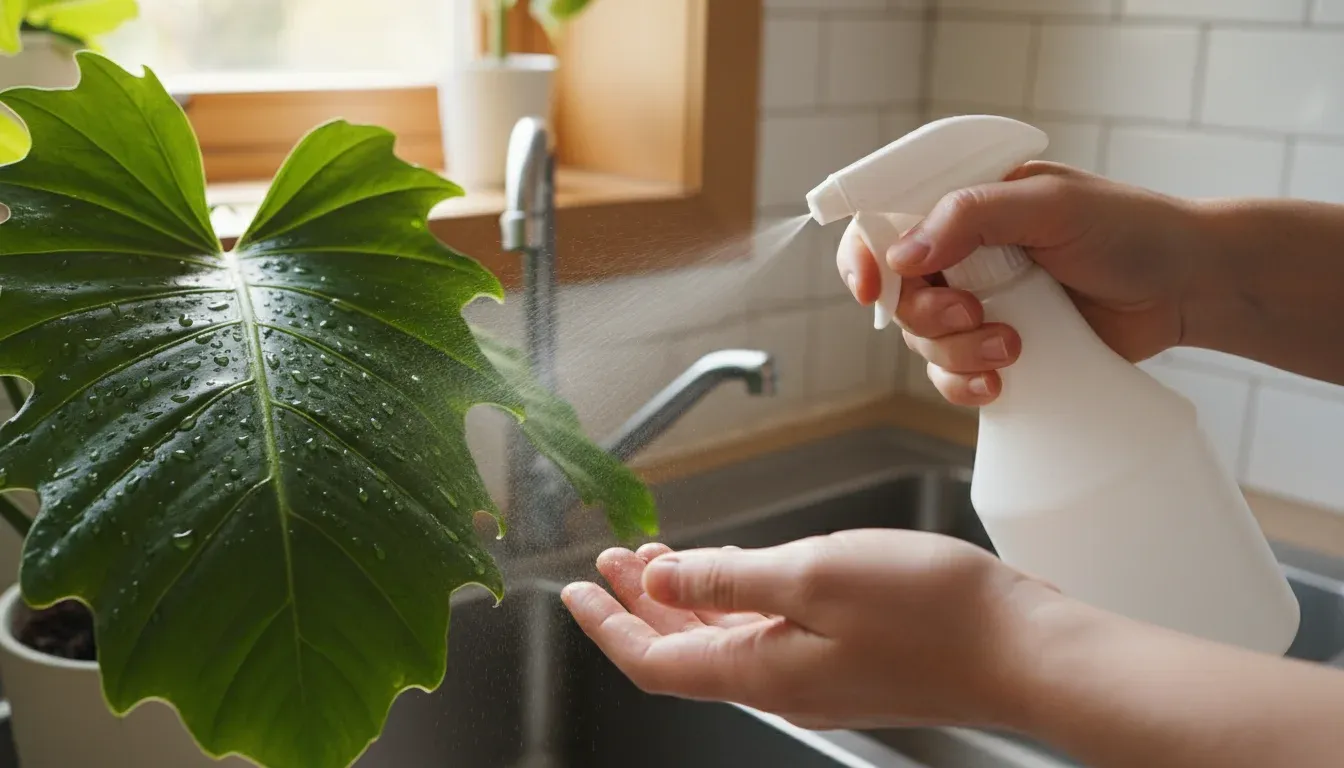
3. Blast Them Off With Water
The simplest method is often the best. Take your plant to the shower or sink and hit it with a strong spray of water, focusing on the undersides of leaves where spider mites gather. Use cold water if you can stand it—they hate cold. The physical force dislodges mites and washes away eggs and webbing.
Do this every 3-4 days for two weeks. You’re not poisoning them, just physically removing them before they can reproduce. Works best for plants with sturdy leaves that can handle the pressure. Skip this if you’ve got delicate ferns or African violets. For large or heavy plants, take them outside and use a garden hose with a spray nozzle.
4. Repeat Treatments Every Week to 10 Days
Here’s what most people get wrong: they treat once and think they’re done. Spider mite eggs hatch continuously, and one application won’t catch them all. You need to break the reproduction cycle by treating repeatedly.
Whether you’re using water, soap, or oil, mark your calendar and treat again in 7-10 days. This timing catches newly hatched mites before they can lay eggs of their own. Continue for at least three cycles (three to four weeks total). If you stop early, the infestation bounces back stronger than before.
5. Insecticidal Soap
This is the step up from water. Insecticidal soap dissolves the mites’ waxy coating and dehydrates them. Mix according to package directions (usually 2-5 tablespoons per gallon of water) and spray until leaves are dripping. Hit the undersides of every leaf—spider mites hide where you’re not looking.
Reapply every 5-7 days until you don’t see webbing or stippling on new growth. Don’t spray in direct sunlight or you’ll burn the leaves. Insecticidal soap works on contact, so thorough coverage matters more than concentration.
6. Neem Oil
Neem oil works as both a killer and a repellent. It disrupts the mites’ hormones so they can’t reproduce or feed normally. Mix 2 tablespoons of neem oil with a gallon of water and a few drops of dish soap (helps it stick to leaves). Spray in the evening when temperatures are cooler—neem can burn leaves in bright sun.
You’ll need to apply it weekly for at least three weeks to break the reproduction cycle. It smells weird (like peanuts and garlic) but it works. Neem is also effective against other houseplant pests like aphids and mealybugs, so it’s worth keeping on hand.
7. Horticultural Oil
Horticultural oil smothers mites on contact by clogging their breathing pores. It’s a step up in intensity from soap and works faster than neem. You can buy it ready-mixed or make your own with a few tablespoons of vegetable oil mixed with dish soap and water.
Spray thoroughly, coating all leaf surfaces. The oil needs to contact the mites to kill them. Don’t use this on stressed plants or in extreme heat. Wait at least two weeks before reapplying—oil residue can build up and interfere with the plant’s ability to breathe.
8. Isopropyl Alcohol Spray
For quick knockdown, mix one part 70% isopropyl alcohol with one part water in a spray bottle. This kills mites on contact and evaporates quickly, so there’s less risk of leaf damage than with oil-based treatments. It’s especially effective on visible webbing.
Test on a single leaf first. Some plants (particularly those with fuzzy leaves) don’t tolerate alcohol well. If the leaf looks fine after 24 hours, spray the whole plant, focusing on webbed areas and undersides. Repeat every few days until the infestation clears.
9. Spinosad Treatment
When gentler methods fail, Spinosad is your next line of defense. It’s a bacterial fermentation product that’s toxic to spider mites but breaks down quickly in sunlight, making it safer for indoor use than synthetic pesticides. Available as sprays or concentrates at garden centers.
Apply according to label directions, coating all leaf surfaces. Spinosad works best on young mites and has some residual effect, so you may get away with 10-14 day intervals between applications. Reserve this for stubborn infestations where soaps and oils haven’t worked.
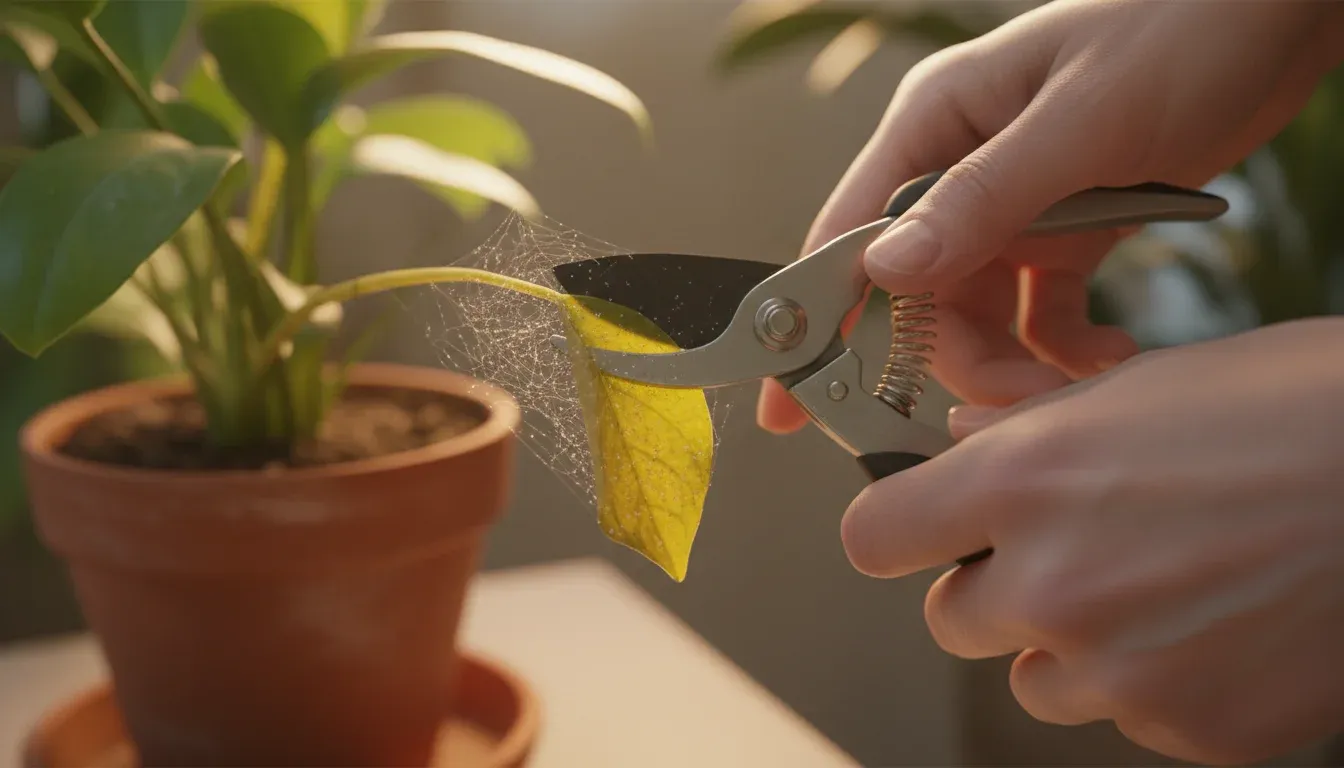
10. Remove Heavily Infested Leaves
If a leaf is more web than green, just cut it off. You’re not saving it, and it’s a breeding ground that’ll reinfest the rest of the plant. Use clean scissors or pruning shears and wipe them with rubbing alcohol between cuts to avoid spreading mites to healthy tissue.
Bag the leaves and throw them in the trash. Don’t compost them—spider mite eggs can survive composting and you’ll just spread the problem to your outdoor garden. Removing heavily damaged foliage also improves air circulation, which helps remaining leaves recover.
11. Quarantine the Plant
Spider mites spread fast between plants, sometimes by crawling and sometimes hitching rides on your clothes or tools. As soon as you spot an infestation, move the affected plant away from others—ideally to a different room. Check neighboring plants for early signs (fine webbing, yellowing stipples on leaves).
Keep the infected plant isolated while you treat it. Wipe down the area where it was sitting with soapy water to kill any mites that dropped off. Don’t bring it back to the group until you’ve gone two weeks without seeing new damage or live mites.
12. Increase Humidity
Spider mites thrive in hot, dry conditions. They hate moisture. If your house is dry (especially in winter when heating systems blast dry air), boost humidity around your plants with a humidifier, pebble trays filled with water, or by grouping plants together to create a microclimate.
This won’t kill an active infestation but it’ll make your plants less attractive to mites and slow their reproduction. Aim for 40-50% humidity. Your plants will look better anyway—most houseplants come from tropical environments and appreciate the moisture.
13. Toss the Plant if Treatment Fails
Sometimes you have to know when to quit. If you’ve treated a plant multiple times over several weeks and you’re not making headway—or the infestation keeps spreading to other plants—it may be time to cut your losses. Spider mites can develop resistance to treatments, and some plants are too far gone to save.
Bag the entire plant, soil and all, and put it in the trash. Don’t try to salvage cuttings—the mites will hitch a ride. Clean the area thoroughly with soapy water. It’s better to lose one plant than to risk your entire collection. You can always buy a replacement; you can’t buy back time spent battling a losing fight.
Spider mites are persistent but not invincible. Catch them early with regular inspections and you can knock them out with water and soap. Wait too long and you’ll need the heavier treatments. The key is consistency—treat, wait, treat again, repeat until they’re gone. Check your plants every week, especially in winter when indoor air is dry and mites are most active. The ones you stop today won’t be the ones you’re battling next month.