Table of Contents
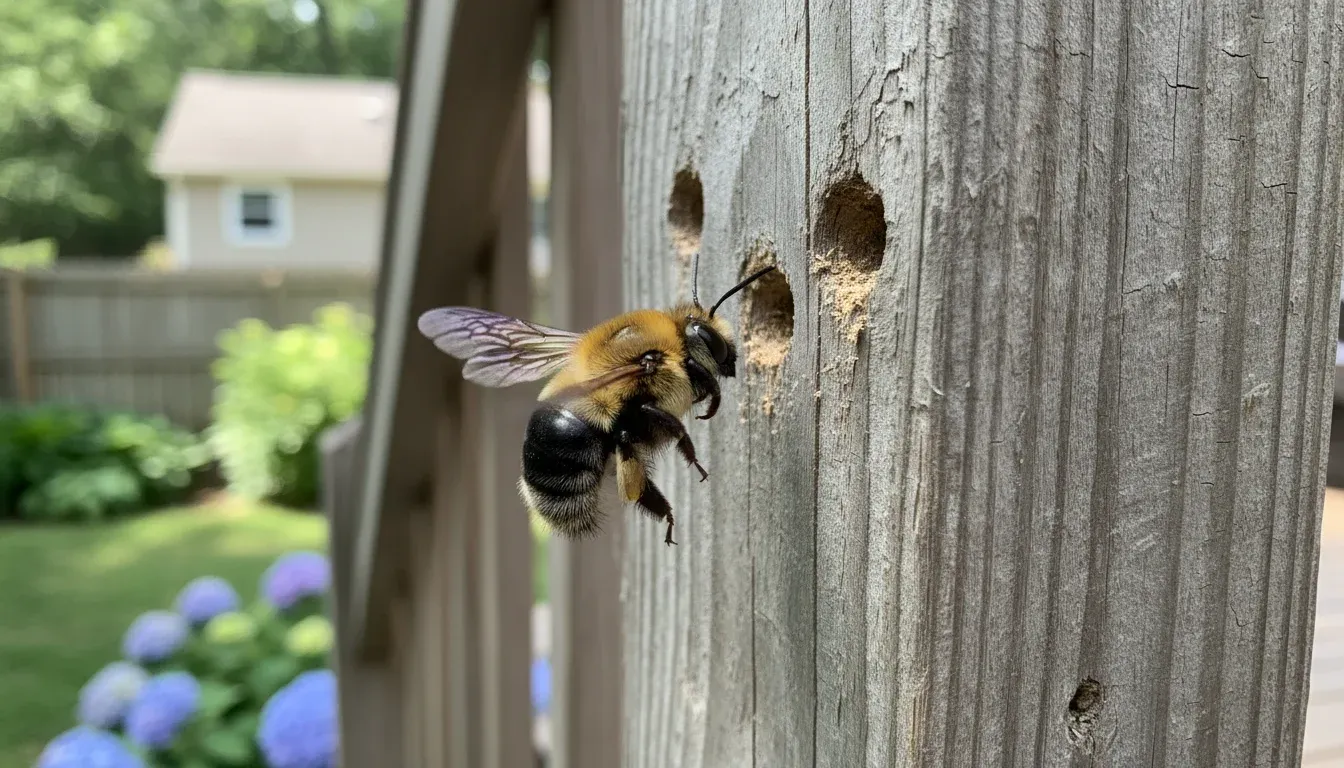
You notice them first by the damage. Perfectly round holes, about the diameter of a pencil, drilled into your deck railings or fence posts. Little piles of sawdust underneath like someone’s been doing tiny woodworking. The culprits are carpenter bees, and while they won’t eat your house like termites, they’re not doing your wood surfaces any favors.
Here’s the thing about carpenter bees: they’re important pollinators. They don’t want to sting you. The males can’t sting at all, and the females would rather drill into wood than deal with you. But that drilling creates tunnels that weaken wood over time and invite woodpeckers looking for larvae snacks. If you’re finding their signature holes around your property, here’s how to handle it.
1. Identify the Holes and Sawdust
Carpenter bee holes are unmistakable once you know what to look for. Clean, round, about half an inch across. You’ll find them in unpainted or weathered wood: deck railings, fascia boards, porch ceilings, outdoor furniture, mailbox posts. The sawdust beneath the hole is your confirmation.
The females drill in about an inch, then turn and tunnel with the grain, sometimes extending several inches. They create individual cells where they lay eggs and stash pollen for the larvae. One bee working alone can do surprising damage over a season. Multiple generations using the same tunnel can create serious structural weakening.
Check south and west-facing surfaces first. Carpenter bees prefer wood that’s been warmed by the sun. Softwoods like pine, cedar, and redwood are favorites, though they’ll drill into hardwood if it’s weathered enough.
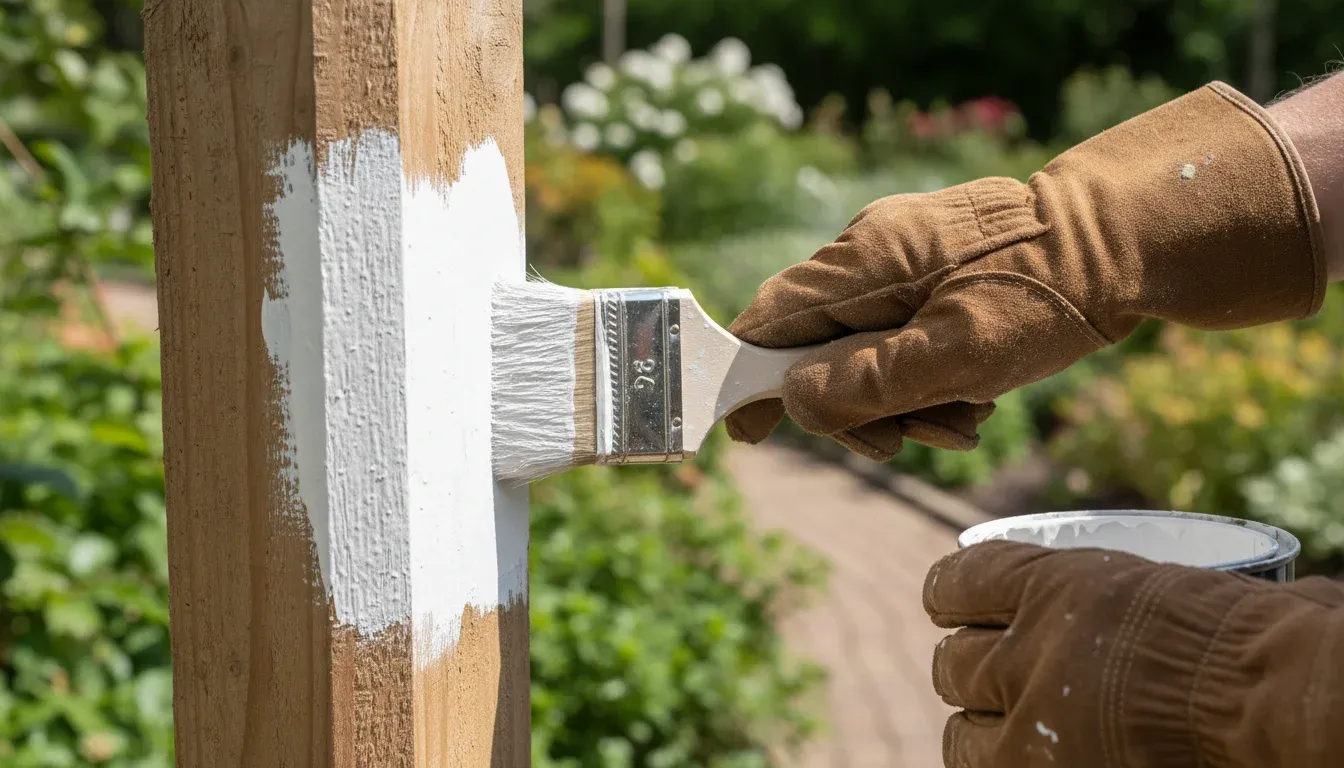
2. Paint or Seal Exposed Wood
Carpenter bees strongly prefer unfinished wood. A good coat of paint or exterior sealant makes wood significantly less attractive to them. It’s not absolute protection – determined bees will occasionally drill through paint – but it reduces the appeal dramatically.
If you’re building new outdoor structures or refinishing old ones, don’t skip the paint. Pressure-treated lumber is better than untreated, but painting or staining adds another layer of protection. The bees use visual and chemical cues to find suitable nesting sites, and finished wood sends the wrong signals.
For existing damage, fill and paint over old holes after treatment. Fresh paint on repaired areas blends in and protects against future invasions.
3. Install Wire Screening on Timber Ends
The rough, cut ends of timbers are particularly attractive to carpenter bees. The exposed grain makes for easier drilling. Covering these vulnerable points with wire mesh screening blocks access.
Use hardware cloth with quarter-inch mesh. Cut pieces large enough to wrap slightly around the edges of the timber end. Attach with exterior-grade staples or screws with washers. Paint over the screening to match the wood if aesthetics matter.
This works well for deck posts, fence posts, pergola beams, and rafter ends. Anywhere you have exposed end grain, screening adds physical protection that bees can’t chew through.
4. Use Non-Wood Materials for New Construction
If you’re replacing damaged elements or building new outdoor structures, consider materials carpenter bees can’t drill into. Vinyl, aluminum, fiber cement board, and composite decking are all immune to bee damage.
These materials cost more upfront but eliminate the ongoing battle with bees. Composite decking has come a long way in appearance and durability. Fiber cement siding can mimic wood grain while being completely pest-resistant.
For existing wood structures you’re not ready to replace, focus on protecting the most vulnerable pieces with the methods above.
5. Treat Active Holes with Insecticide
Once bees have established tunnels, you need to deal with the occupants before sealing the holes. Insecticides labeled for carpenter bees come in aerosol foams and dusts designed to reach deep into tunnels.
Apply the treatment in early morning or evening when bees are less active. The foam or dust fills the tunnel and kills the adult bee and any larvae inside. Wait several days after treatment before sealing to ensure everything inside is dead.
If the idea of insecticides bothers you, consider that carpenter bees are solitary pollinators, not colony builders. You’re eliminating individual problem bees, not wiping out a hive. The environmental impact is minimal compared to honeybee colony treatments.
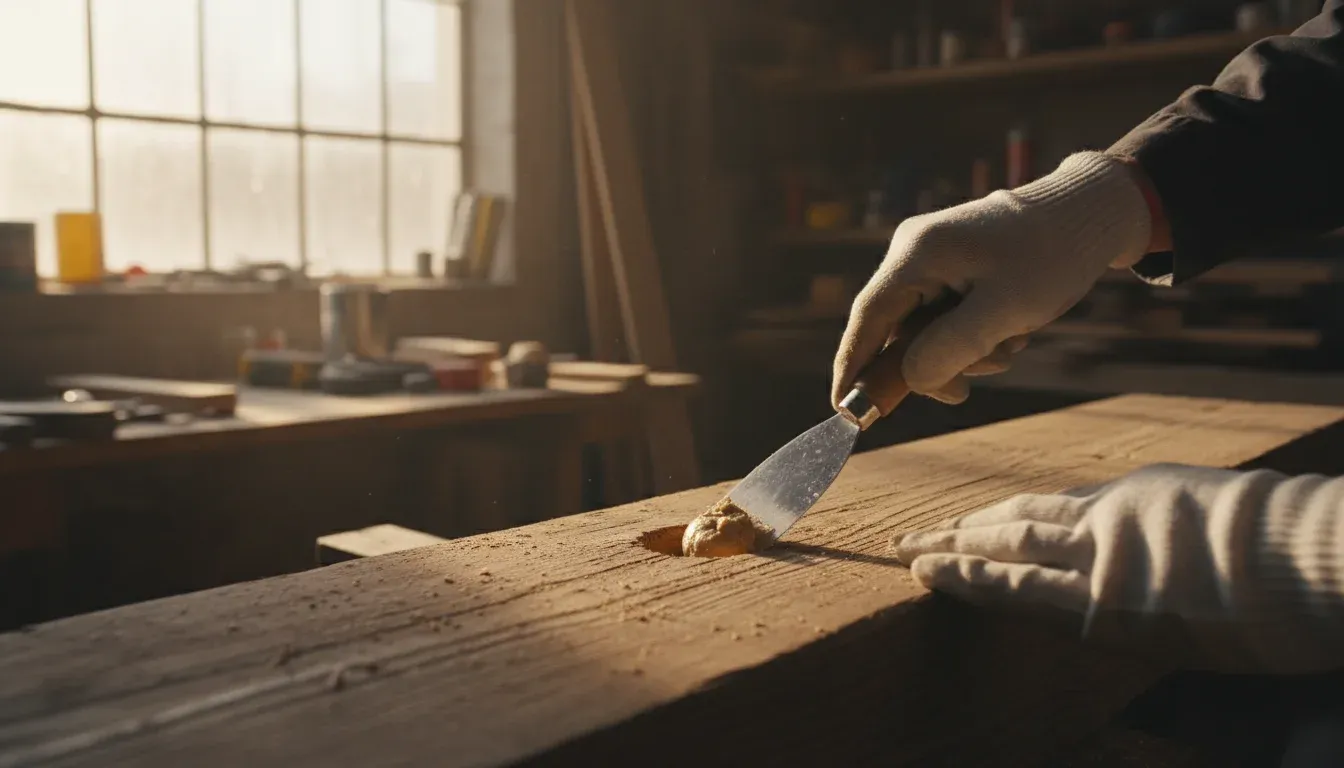
6. Seal Holes After Treatment
Never seal carpenter bee holes while bees are still active inside. They’ll either chew their way out through another spot or die and rot inside the wood. Both create bigger problems than the original holes.
After treating and waiting the recommended time, fill holes with wood putty, exterior caulk, or wooden dowels glued in place. Sand smooth and paint to match the surrounding surface. This prevents moisture from entering the tunnel and stops future bees from using the same hole.
For extensive damage, you may need to replace entire boards or timbers. Carpenter bee tunnels can compromise structural integrity if they go deep enough or if multiple generations have used the same site.
7. Hang Bee Traps as Deterrents
Carpenter bee traps are wooden boxes with angled holes that lead to a collection jar. Bees enter thinking they’ve found a perfect nesting site, then can’t navigate back out and fall into the jar.
Hang these near existing bee activity or high-risk areas like deck railings and fascia boards. They catch some bees and may reduce pressure on your wood surfaces. Empty the collection jars regularly.
Traps alone won’t solve an established infestation, but they can be part of an integrated approach. Position them where you see the most bee activity for best results.
8. Apply Almond Oil or Citrus Spray
Some homeowners report success repelling carpenter bees with strong scents. Almond oil, citrus oil, or tea tree oil sprays applied to wood surfaces may make them less attractive. The evidence is anecdotal but worth trying for mild problems.
Mix 15-20 drops of essential oil with water in a spray bottle. Apply to vulnerable wood surfaces weekly during bee season (spring and early summer). Reapply after rain. This won’t stop determined bees but may redirect them to untreated areas – which is fine if you’re protecting specific structures.
Don’t expect miracles from natural repellents. They work best as part of a comprehensive approach including paint, screening, and physical barriers.
Understanding the Lifecycle
Carpenter bees emerge in spring when temperatures consistently hit the 70s. Males appear first and stake out territory, which is why you see them dive-bombing anything that moves near their chosen nesting area. They’re harmless but aggressive-looking.
Females do the actual drilling, sometimes taking weeks to complete a tunnel. They provision each cell with pollen, lay an egg, and seal it before moving to the next cell. The new generation emerges in late summer, feeds on nectar, then overwinters in the old tunnels.
This lifecycle means you’ll see two waves of activity: spring when adults emerge and late summer when new bees appear. Your prevention and treatment efforts should focus on spring before nesting begins.
When to Call a Professional
If you have extensive tunneling in structural timbers, multiple bees across large areas, or damage in hard-to-reach places like high fascia boards, consider hiring a pest control professional. They have the equipment to reach difficult spots and can apply treatments safely.
Structural damage from carpenter bees is rare but possible. If you can insert a pencil several inches into a tunnel or see wood crumbling around holes, the integrity may be compromised. A professional can assess whether repair or replacement is needed.
For most homeowners, carpenter bees are a manageable nuisance rather than a crisis. A combination of paint, screening, and timely treatment of active holes keeps the problem under control without drastic measures.