Table of Contents
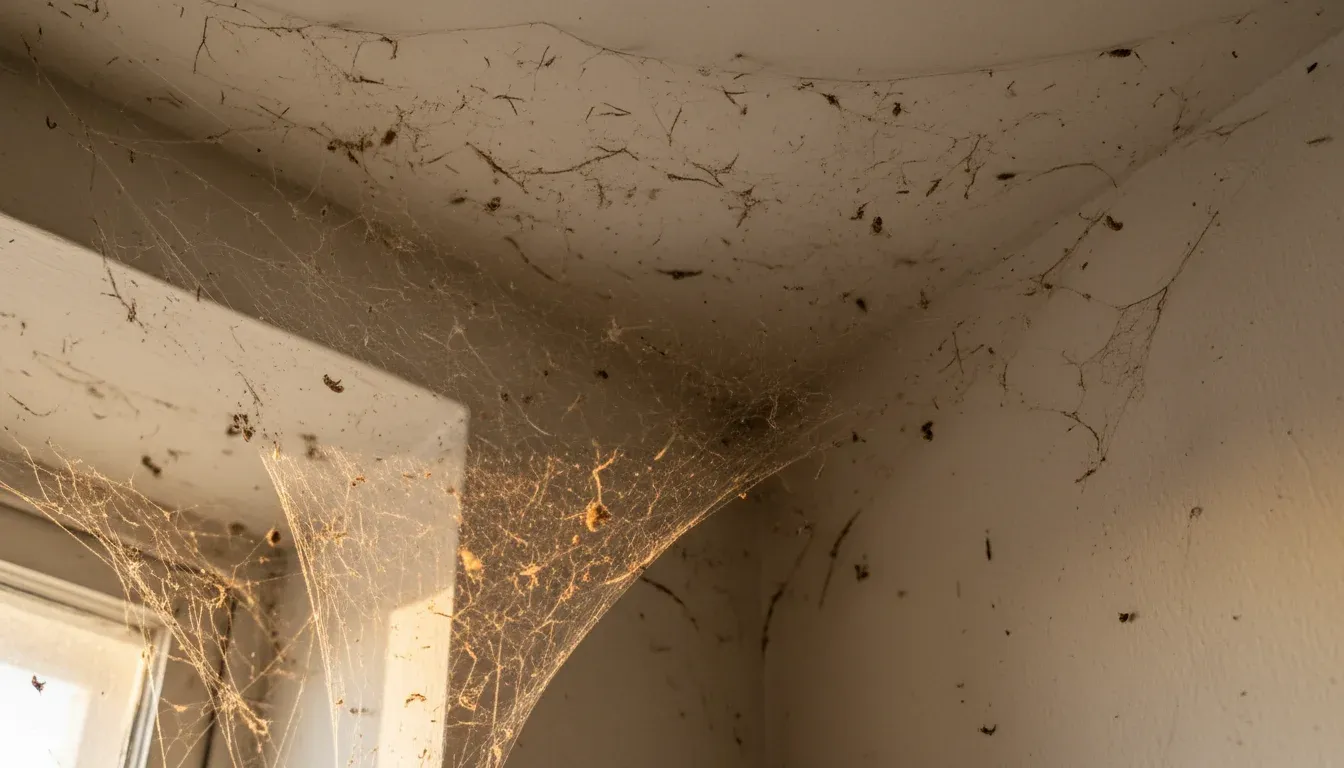
Spider webs make your home look neglected even when everything else is spotless. They collect dust, dead insects, and seem to reappear overnight in the same corners you just cleaned. Getting rid of them isn’t just about aesthetics – webs attract more spiders and signal that your space is available real estate.
The good news is that web removal is straightforward. The bad news is that it’s ongoing. Unless you eliminate the spiders creating them, you’ll be back at it weekly. Here’s how to clear webs effectively and slow their return.
1. Vacuum with Extension Hose
A vacuum with a long extension hose and brush attachment is the most efficient web removal tool. The suction pulls the entire web – threads, dust, and captured insects – into the canister without spreading debris. Use the brush head to agitate stubborn strands.
Work from top to bottom, starting with ceiling corners and crown molding. Move down to window frames, baseboards, and furniture. Empty the vacuum immediately after, especially if you sucked up egg sacs. Those can hatch inside the vacuum and crawl back out. Not a pleasant surprise.
2. Use a Cobweb Duster
Cobweb dusters are specifically designed for this job. They’re essentially long poles with sticky or bristled heads that grab webs on contact. The sticky versions work best – webs adhere to the surface and don’t fall on you.
Twist the duster as you make contact to wrap the web around the head. Peel off the accumulated mess with a paper towel and keep going. These tools reach 15+ feet, eliminating the need for ladders in most homes. Store it where you’ll actually use it – if it’s buried in a closet, you’ll ignore the webs instead.
3. Spray with Water and Wipe
For webs on surfaces you can’t vacuum – painted walls, textured ceilings, delicate trim – spray with plain water and wipe with a microfiber cloth. The water dissolves the adhesive silk, making removal easier.
Don’t soak the area. A light mist is enough. Wipe in a circular motion to gather all the strands. For textured surfaces like popcorn ceilings, pat gently rather than wiping to avoid damaging the texture. Follow with a dry cloth to prevent water spots.

4. Remove with Broom and Dustpan
The classic method still works. A broom with stiff bristles knocks webs down effectively. Sweep into a dustpan and dispose of immediately. This is satisfying for heavy infestations where you want to see results.
The downside is that it spreads debris. Bits of web and dust fall as you work. Do this before vacuuming the floor, not after. Wear a hat or bandana – nobody wants spider web in their hair. Work methodically from one side of the room to the other.
5. Use a Long-Handled Brush
For outdoor webs on eaves, porches, and patio furniture, a stiff-bristled brush on an extendable pole works best. The bristles scrub webs off textured surfaces like painted wood and wicker.
Work on dry days when webs are brittle and break away easily. Damp webs cling and smear. Brush directly into a trash bag or onto the ground where you can sweep them up. Check outdoor lights – they’re spider magnets and usually covered in webs.
6. Apply Peppermint Oil Deterrent
Spiders hate peppermint. Mix 15-20 drops of peppermint essential oil with water in a spray bottle. Apply to corners, window frames, and other web-prone areas after cleaning. The scent repels spiders without harming them.
Reapply weekly or after cleaning. This won’t eliminate spiders completely but it makes your home less appealing than the neighbor’s untreated house. For best results, combine with sealing entry points so spiders can’t easily return.
7. Seal Entry Points
Webs inside mean spiders are getting in. Caulk gaps around windows, doors, and utility penetrations. Replace damaged weatherstripping. Install door sweeps to close the gap at the bottom of exterior doors.
Focus on the upper floor too – spiders climb walls and enter through second-story gaps. Check where cables and pipes enter the house. A tube of caulk is cheap prevention that saves hours of web removal later.

8. Reduce Outdoor Lighting
Outdoor lights attract insects, which attract spiders. Switch to yellow bug lights or turn off unnecessary lights. Move lighting away from the house if possible – illuminate paths and patios from a distance so bugs gather away from your walls.
Spiders build webs where the food is. Remove the food source and they relocate. This is long-term prevention, not immediate relief. Combined with web removal and sealing, it significantly reduces spider pressure on your home.
9. Maintain Regular Cleaning Schedule
Webs are easier to remove when fresh. Old webs accumulate dust and become cemented to surfaces. Check for webs weekly during spider season (spring through fall in most climates). A five-minute walkthrough prevents major buildup.
Pay special attention to rarely-used rooms, storage areas, and ceiling corners. These are spider favorites because they’re undisturbed. The more frequently you clean, the less time spiders have to establish permanent residences.
10. Clear Vegetation Near House
Bushes, shrubs, and climbing vines touching your house are spider highways. They provide cover, prey, and easy access to walls and eaves. Trim everything back at least 12 inches from the foundation and exterior walls.
Firewood stacks, compost bins, and garden debris near the house also attract spiders. Move them farther away. The less habitat adjacent to your home, the fewer spiders make the trip inside. This outdoor work reduces indoor web problems significantly.
When to Call a Professional
If you’re removing webs daily and still finding new ones, you may have a significant spider population living in wall voids or attic spaces. A pest control professional can treat these hidden areas and identify entry points you’ve missed.
For most homes, consistent web removal combined with sealing and deterrents keeps the problem manageable. Spiders are beneficial outdoors – they eat mosquitoes and other pests. You just don’t want them decorating your living room.