Table of Contents
Weeds in garden beds have everything they need to keep coming back: cultivated, loose soil, gaps between plants, and regular disturbance that brings dormant seeds to the surface. Every time you dig or plant, you start a new germination window. They win by default if you don’t manage two things – removal (hoe or pull what’s there) and prevention (mulch or pre-emergent to stop the next generation). Both, in that order, handled below. See the weeds hub if you’re also dealing with lawn or paving situations.
1. Hoe Weeds Between Plants
This is the fastest active method for established beds, and it’s underused because people assume a hoe is too aggressive near plants. It isn’t, if you use the right one and work shallow.
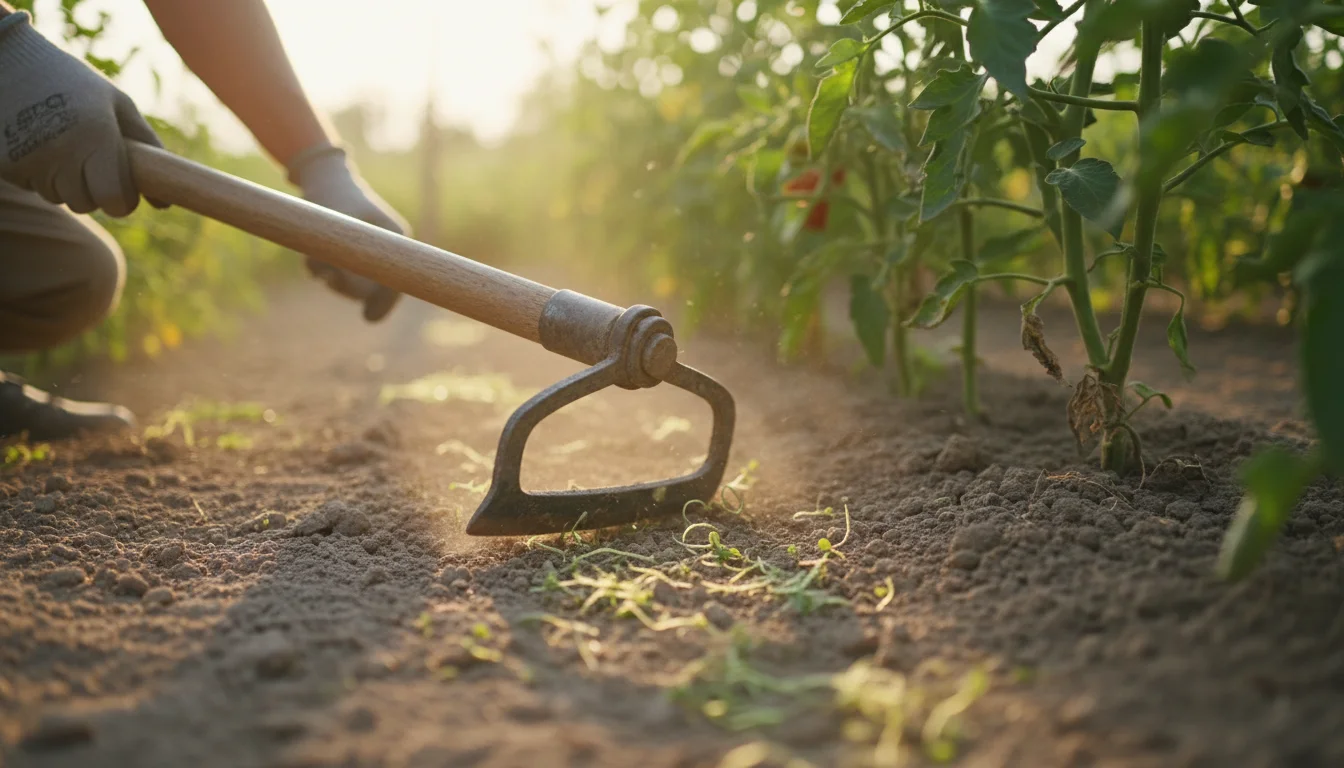
Push a hoe blade just below the soil surface – 1-2 cm deep is enough to sever stems from roots without disturbing buried seeds deeper down. Work when soil is dry. Cut weeds that get left on dry soil desiccate and die within a few hours. Do this in wet conditions and many of them re-root before the day is out.
A stirrup hoe (also called a scuffle or hula hoe) is the right tool here. It cuts on both push and pull strokes, making it roughly twice as fast as a standard flat hoe. The oscillating blade also self-cleans as you work. For tight spots between plants, a hand-held collinear hoe gives the same shallow-cut action with better control.
The best time to hoe is when weeds are at the "thread stage" – barely visible as a green film on the soil surface. At that size, one pass kills an entire generation before it’s established. Once weeds are 2-3 in (5-8 cm) tall, you’ll need to hoe twice to get them all.
A word on annual vs. perennial weeds: hoeing handles annuals easily. Perennials with established roots (dandelions, bindweed, dock) will reshoot from root fragments. For those, switch to hand-pulling or targeted digging.
2. Hand-Pull Weeds (The Right Way)
For tap-rooted perennials where hoeing doesn’t finish the job, hand-pulling is the answer. But you have to do it right, or you’re just pruning them.
Pull when soil is moist – after rain or watering. You need the entire root out. For dandelions and dock, use a weeding knife or a narrow trowel to get at least 4 in (10 cm) down before pulling. A mature dandelion with a 10 in (25 cm) taproot won’t come out cleanly with a bare-handed tug; it’ll break off and regrow. The seedlings are a different story – a two-week-old dandelion pulls out root-and-all with almost no effort.
The timing rule: go after them young. Every week you wait, roots deepen and the job gets harder.
One thing people skip: trash the pulled weeds, don’t compost them. One dandelion head produces around 200 seeds. If those seeds are still viable when your weeds go into the compost, you’re spreading them back onto the garden in a few months. Compost pulled weeds only if you’re certain they haven’t gone to seed.
3. Deep Mulch Suppression (Best Long-Term Fix for Weeds in Garden Beds)
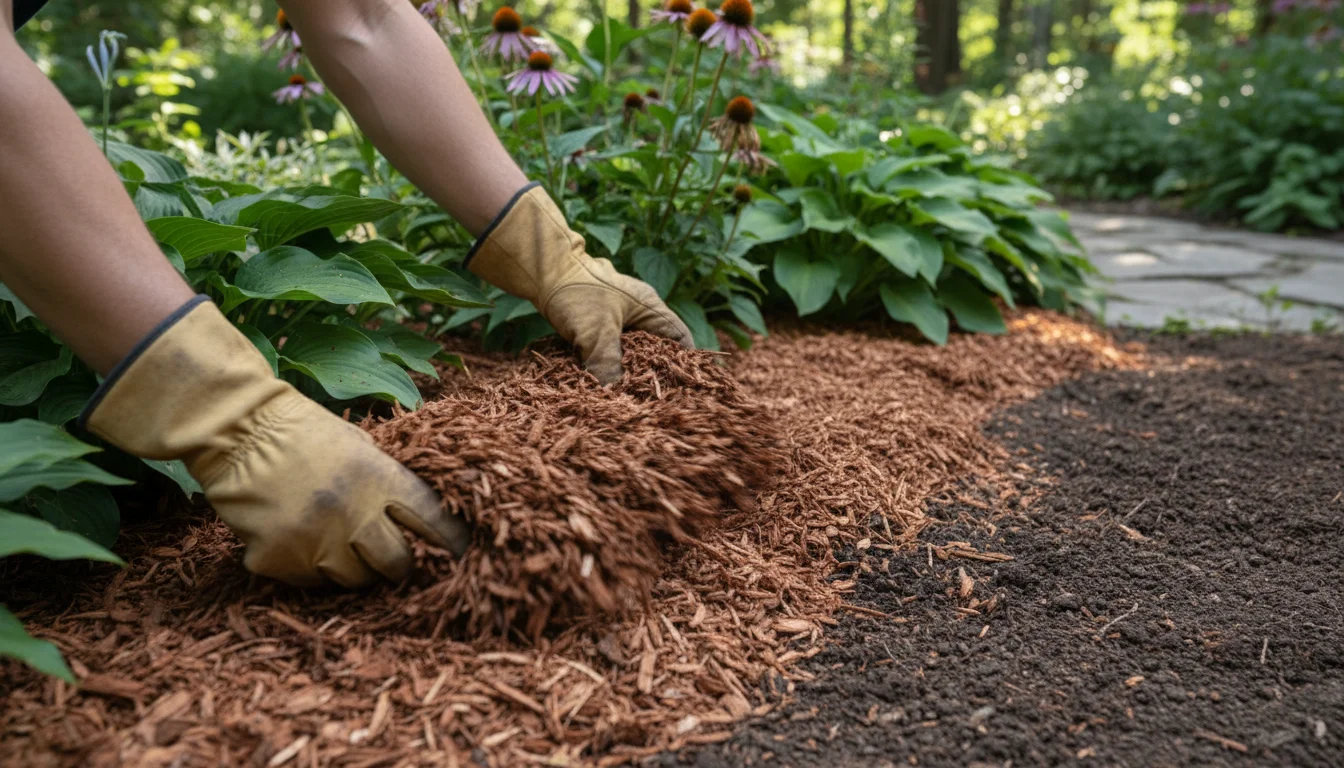
After removal, mulch is what keeps the bed clean between sessions. A 3-4 in (8-10 cm) layer of wood chips, shredded bark, or straw blocks light from reaching the soil surface and prevents most weed seeds from germinating. Those that do germinate can’t push through the full depth.
Apply mulch directly after removing existing weeds while the soil is clear. Rake it evenly across the bed surface and keep it pulled back slightly from plant stems – mulch piled against stems traps moisture and can cause rot.
Mulch breaks down over one to two growing seasons and needs topping up. The decomposition is a feature, not a bug: it improves soil structure and feeds earthworms. But as the layer thins below 2 in (5 cm), weed pressure starts coming back. Add 1-2 in (3-5 cm) of fresh material each spring.
Wood chips and shredded bark last longer than straw. Straw (not hay – hay contains seeds) breaks down faster and is better for vegetable beds where you’re digging regularly.
4. Smother with Cardboard and Mulch
For heavily infested beds or new beds you’re establishing from scratch, cardboard sheet mulching takes care of everything under it in one season. It’s the method for when the weed problem is too dense to tackle one plant at a time.
Cut or pull existing weeds to ground level first. Then lay plain cardboard (flattened boxes, single-layer, remove any tape and staples) directly on the soil in overlapping sheets – overlap by at least 6 in (15 cm) at the edges so weeds can’t push up through the seams. Wet the cardboard down thoroughly so it conforms to the soil surface and won’t blow up in wind.
Cover immediately with 4-6 in (10-15 cm) of wood chip mulch. This holds the cardboard in place and continues the suppression as the cardboard decomposes over several months.
The cardboard breaks down within one growing season. Earthworms love it. By the following spring, the soil underneath has improved texture and the weed seed bank is substantially depleted. You can plant directly through it before it breaks down by cutting X-shaped slits through both cardboard and mulch.
This works for established ornamental plants too – just cut the slits around existing stems and pile the mulch and cardboard up to (but not touching) the plant base.
5. Landscape Fabric Barriers
For ornamental and perennial beds where you’re not regularly digging, landscape fabric provides multi-year weed suppression. Install it once and it handles the problem structurally rather than requiring ongoing labour.
Lay the fabric over cleared soil, overlapping panels by at least 6 in (15 cm). Cut X-shaped slits for existing plant stems. Stake edges with landscape pins every 30 cm or weight them down with mulch. Cover with 2-3 in (5-8 cm) of decorative mulch or gravel to protect the fabric from UV degradation and to improve appearance.
Skip the cheap fabric. Thin woven fabric tears within a season and weeds push through gaps in the damaged material. Spend on a thick non-woven geotextile – it costs more upfront but lasts 5-10 years. You’ll recognise the difference by weight: quality landscape fabric has real resistance when you pull it.
One limitation: landscape fabric doesn’t work well in vegetable beds where you’re digging regularly. The annual disruption degrades it quickly. It’s best suited to permanent plantings – established perennials, shrubs, ornamentals – where the soil doesn’t get turned each season.
6. Corn Gluten Meal (Organic Pre-Emergent)
If you’d rather not use synthetic herbicides, corn gluten meal is the organic pre-emergent option. It inhibits root formation in germinating seeds, stopping annual weeds before they establish.
Apply in early spring at 20 lb per 1,000 sq ft (roughly 1 kg per 10 m²), about a month before your last frost date – before the weed seeds in your beds start germinating. Water it in after application, then let the soil surface dry out. The active compounds move into the soil as the granules break down.
The honest caveat: it’s less effective than synthetic pre-emergents. Expect around 60% weed control versus 90% from chemical options. It also won’t work if it stays wet after application – it needs that dry period to function. Apply in spring before the rainy season if that’s a factor.
One critical warning that applies to all pre-emergents including this one: don’t apply corn gluten meal in beds where you’re direct-seeding vegetables or flowers. It inhibits all seeds equally – your carrot seeds are as vulnerable as the weed seeds. Apply only around established transplants.
7. Apply Pre-Emergent Herbicides in Early Spring
Synthetic pre-emergents (pendimethalin, trifluralin, or isoxaben are common active ingredients in garden-labeled products) provide about 90% annual weed control when applied correctly. They’re the most reliable chemical prevention option for established ornamental beds.
Timing is critical and non-negotiable: apply before soil temperatures reach 60-65°F (15-18°C). That’s the germination threshold for most annual weeds. Once they’ve sprouted, pre-emergents do nothing. In most temperate regions, this means application in late February through mid-March. Use a soil thermometer or check your local extension service’s soil temperature maps.
Apply according to label rates and water in within 24 hours. Do not apply near seedlings, newly transplanted material, or areas where you’re planning to direct-seed anything in the next 6-8 weeks. Pre-emergents don’t distinguish between weed seeds and the seeds or young roots of plants you actually want.
Repeat annually. One spring application typically provides 3-4 months of residual activity, covering the peak germination window. Fall application with a different product can handle cool-season weeds if those are a problem in your beds.
8. Crowd Them Out with Dense Ground Cover
The long-term structural answer for beds that keep refilling with weeds: plant something that outcompetes them for space and light. Weeds thrive in bare, disturbed soil. Dense ground cover plants remove the vacancy.
Creeping thyme, sweet woodruff, ajuga, low-growing sedums, or ornamental strawberry all spread laterally and form a mat that blocks light from reaching the soil surface. They occupy the root zone so weed seedlings can’t establish. Low-growing clover is another option that also fixes nitrogen.
This takes one to two growing seasons to fully establish, so combine it with mulch suppression during the transition. Once the ground cover is dense enough to shade the soil between plants, weed pressure drops dramatically and stays low with minimal maintenance.
Match the ground cover to your bed’s light conditions. Creeping thyme needs sun; sweet woodruff handles shade. Ajuga tolerates both. Don’t plant an aggressive spreader like vinca (periwinkle) near natural areas – it can escape garden beds and become invasive.
FAQ
How do I kill weeds in my garden without killing vegetables?
Mechanical methods are the safest: hoe or hand-pull, no chemical drift risk. For chemical options, spot-spray with horticultural vinegar (20% acetic acid) on a calm, sunny day using a targeted bottle – never broadcast spray near vegetables. Pre-emergent herbicides are safe around established transplants but will prevent vegetable seeds from germinating, so don’t apply before or during direct seeding.
What kills weeds permanently in a garden?
Nothing does it in one treatment. Permanent control is a combination: remove existing weeds (hoe, pull, or smother), then prevent the next generation (mulch, pre-emergent, or dense ground cover). Annual maintenance keeps the seed bank depleted over time. Skip any one step and weeds cycle back within a season.
What’s the fastest way to clear a heavily weeded bed?
Sheet mulching with cardboard and wood chips clears a densely weeded bed in one pass and handles it for the rest of the growing season. Cut the existing weeds to ground level, lay overlapping cardboard, cover with 4-6 in (10-15 cm) of mulch. Most weeds won’t push through. Those that do can be pulled easily – the mulch keeps soil loose.
How often do I need to weed?
In spring and early summer, weekly. That’s the main germination window – weed seeds that were dormant all winter come up fast when soil warms. A 20-minute hoe session every 7-10 days during peak season keeps beds manageable. By midsummer, the flush slows and you can drop to every 2-3 weeks.